Crank Pulley tool
Crank Pulley tool is a necessity if you build your engines
Crank pulley tool for both removing and installing the pulley. On many of todays engines the pulley is also the harmonic balancer. If you don't own one of these tools you can go to your local auto parts store and utilize the "loan-a-tool" program to borrow it long enough to get the job done. Return the tool to get your money back. If you work on cars enough it may justify buying the tool out right. This saves time running to the parts store just to borrow the "whatever you need", remember time is money if you do mechanic work for a living or even as a side gig.
Harmonic balancer installer - Home made life saver!
I changed head gaskets and timing chains on a Dodge Durango with the 4.7 liter v8. Went to re-install the harmonic balancer and discovered that the installer I had would not reach far enough into the crank snout to engage the threads. You want plenty of thread engagement or you will pull what few threads you do grab out of the crank. Then you really have a BIG problem. Anyway, the tool I had would not even reach the threads at all. So, I went to every parts in town they didn't have the proper tool to loan or buy. One place here in town said that there Nashville location had just what we needed. So taking the original balancer bolt with me to make sure the length and threads were correct if I had to drive 35 miles to get it. Get there and guess what? Yep, you guessed it .. wrong one! So I decided to just make one.
You need:
I used a piece of 1/2 - 20 all-thread. Use whatever diameter all-thread closest matches the diameter of the harmonic balancer bolt. The longer the bolt the better.
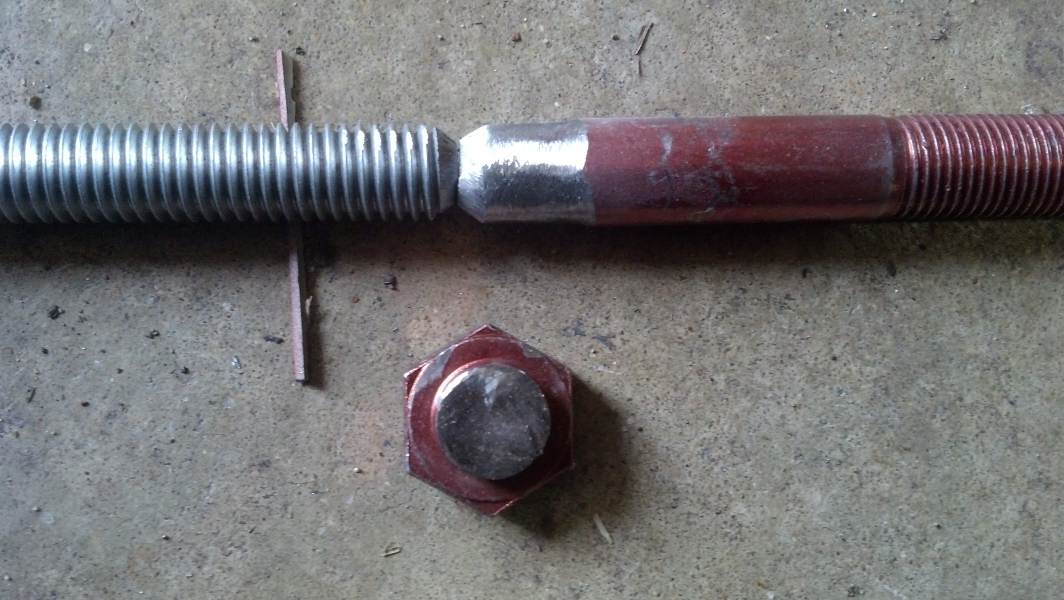
A bolt that matches the same thread size and pitch as the original harmonic balancer bolt.
A steel spacer that the internal diameter goes over both the all-thread and bolt that you purchased that matches the balancer bolt.
|
Cut the head off the bolt. Cut close to the hex head to leave as much of the shaft as possible. Chamfer the all-tread and the cut end of the bolt. |
 |
|
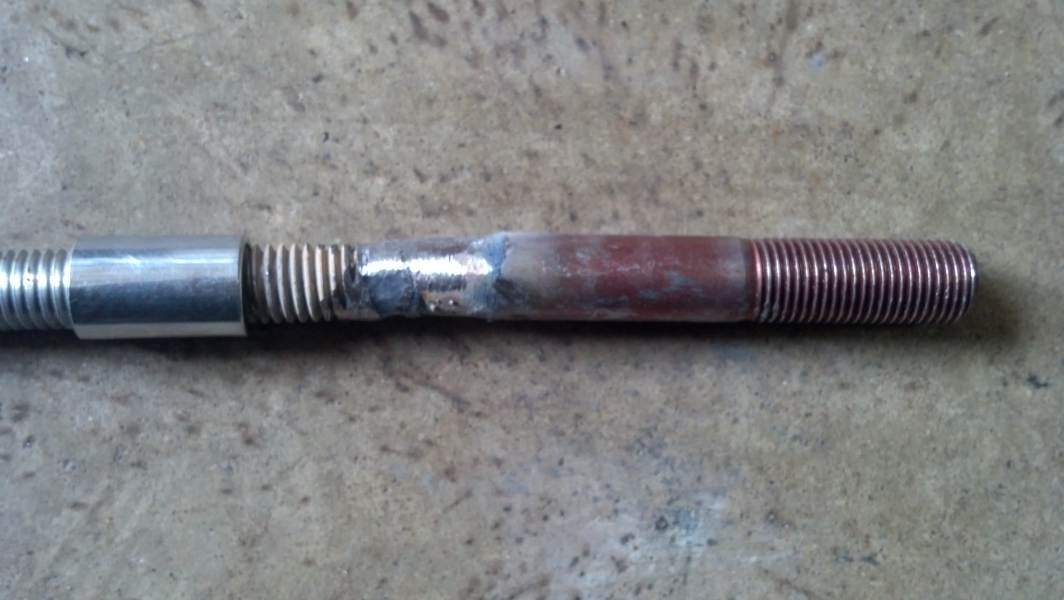
Weld around the chamfered groove then grind the weld flush. Slide the steel sleeve up in place to make sure that half of it is on each bolt. You may have to grind a bit on one bolt or another until the sleeve slides into the proper position. |
 |
|
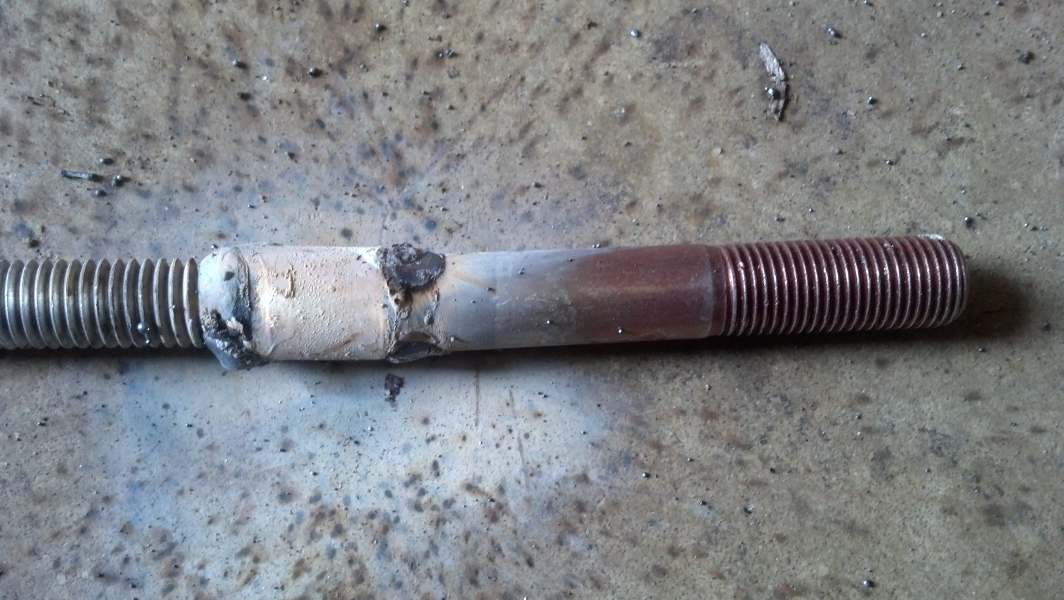
Slide the sleeve up so that it is split between the two bolts. Weld the ends of the sleeve to the bolts and grind the welds flush. Mine is a bit crooked, I was in a hurry. |
 |
|
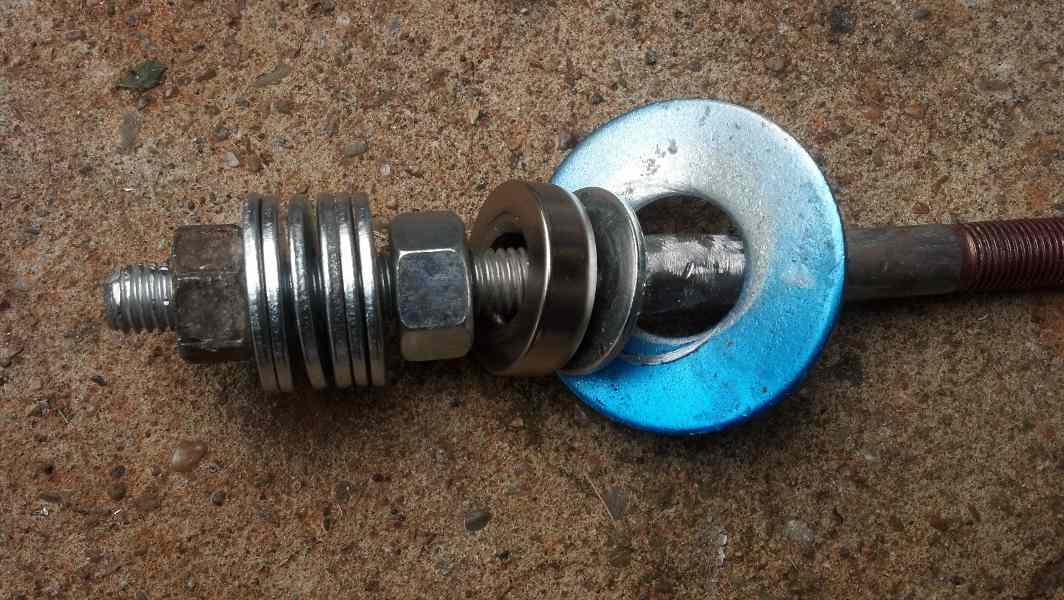
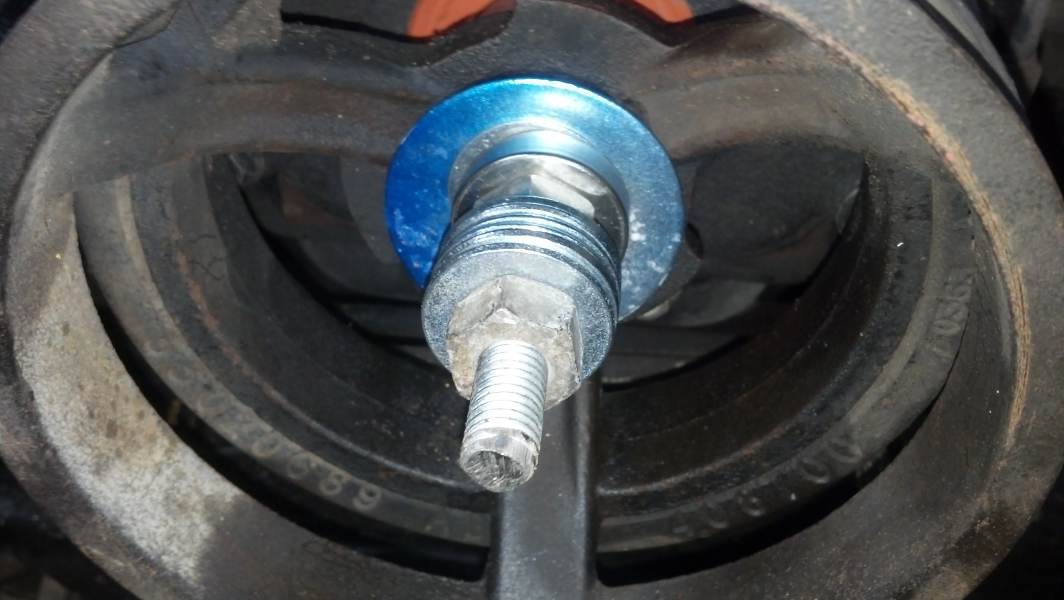
Get some washers/nuts that are large enough to slide over the sleeve. Add as many washers as needed. Since I used 1/2-20 all-thread, I used an old 1/2-20 nut to push the balancer into place. Also notice that I'm using a thrust bearing to assist in making the installation easier. The thrust bearing comes from my regular installer kit. If you don't have a thrust bearing. Stack plenty of washers with grease between each washer. You may need to trim the all-thread down short enough to fit in the work area you have to work with. Just be sure not to accidentally cut it too short. You would hate to start over again. |
 |
|
Here's a shot of it in action. Below is a YouTube video of it in action. |
 |
If my YouTube videos and website has helped you. Please help supprt FixJeeps.com by making you purchases though Amazon. I get a small commision that cost you not a penny more. It helps support the site and more educational projects for you to see. Thanks!